样式来源
1.内联样式
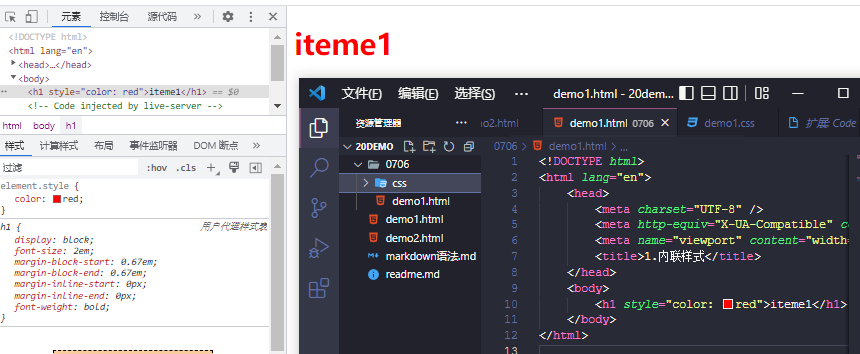
<!DOCTYPE html>
<html lang="en">
    <head>
        <meta charset="UTF-8" />
        <meta http-equiv="X-UA-Compatible" content="IE=edge" />
        <meta name="viewport" content="width=device-width, initial-scale=1.0" />
        <title>1.内联样式</title>
    </head>
    <body>
        <h1 style="color: red">iteme1</h1>
    </body>
</html>
2.内部样式/文档样式
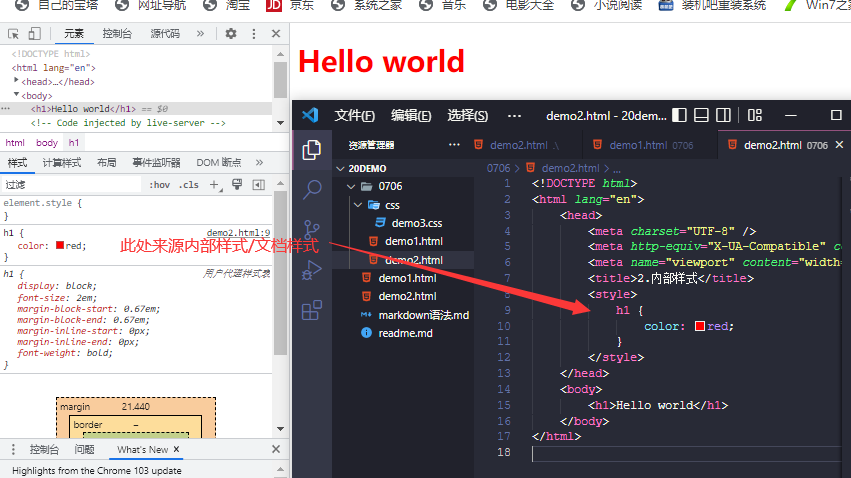
<!DOCTYPE html>
<html lang="en">
    <head>
        <meta charset="UTF-8" />
        <meta http-equiv="X-UA-Compatible" content="IE=edge" />
        <meta name="viewport" content="width=device-width, initial-scale=1.0" />
        <title>2.内部样式</title>
        <style>
            h1 {
                color: red;
            }
        </style>
    </head>
    <body>
        <h1>Hello world</h1>
    </body>
</html>
3.外部样式
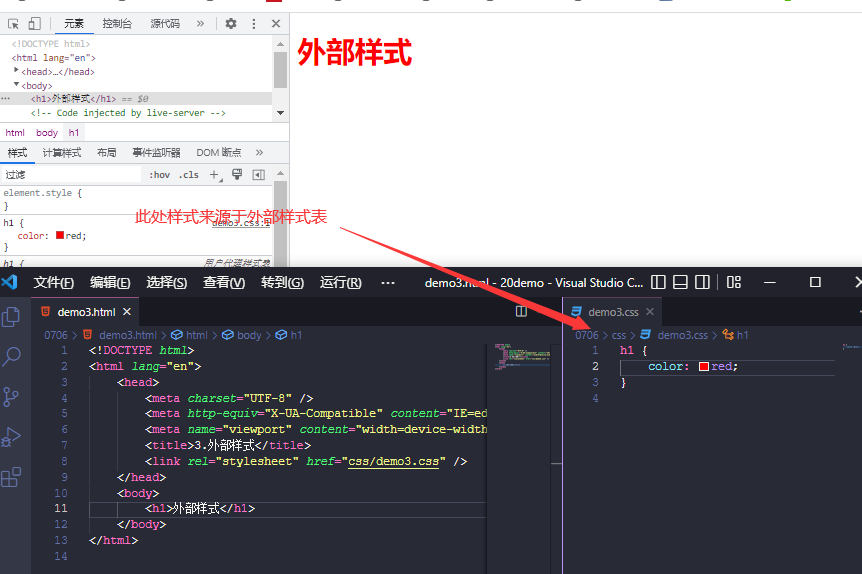
<!DOCTYPE html>

<html lang="en">
    <head>
        <meta charset="UTF-8" />
        <meta http-equiv="X-UA-Compatible" content="IE=edge" />
        <meta name="viewport" content="width=device-width, initial-scale=1.0" />
        <title>3.外部样式</title>
        <link rel="stylesheet" href="css/demo3.css" />
    </head>
    <body>
          <!-- HTML代码部分 -->
        <h1>外部样式</h1>
    </body>
</html>
/*demo3.css文件内容*/
h1 {
color: red;
}样式优先级
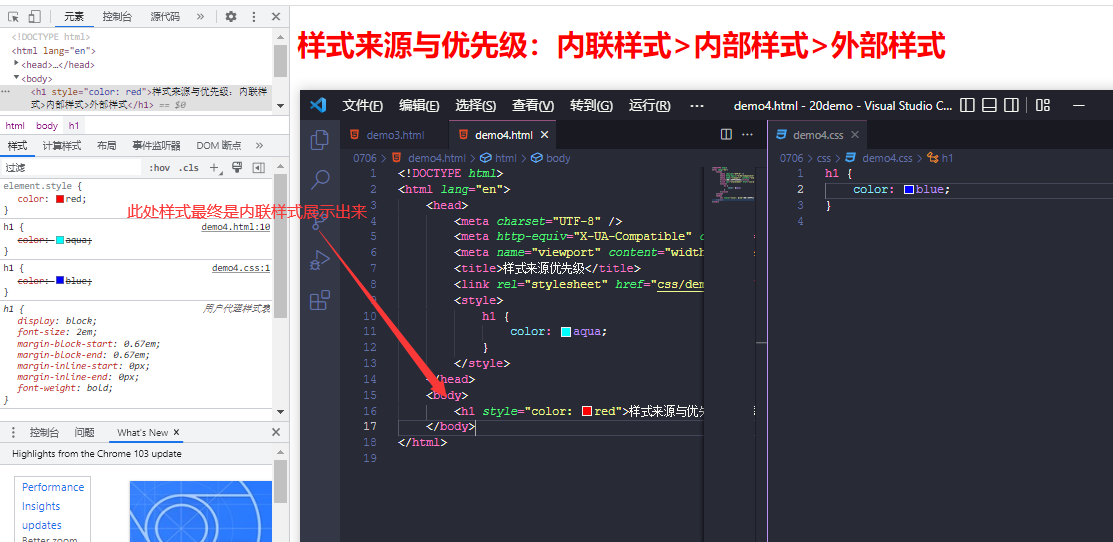
- HTML部分代码
<!DOCTYPE html>
<html lang="en">
    <head>
        <meta charset="UTF-8" />
        <meta http-equiv="X-UA-Compatible" content="IE=edge" />
        <meta name="viewport" content="width=device-width, initial-scale=1.0" />
        <title>样式来源优先级</title>
        <link rel="stylesheet" href="css/demo4.css" />
        <style>
            h1 {
                color: aqua;
            }
        </style>
    </head>
    <body>
        <h1 style="color: red">样式来源与优先级:内联样式>内部样式>外部样式</h1>
    </body>
</html>
- css部分代码
h1 {
    color: blue;
}
常用选择器
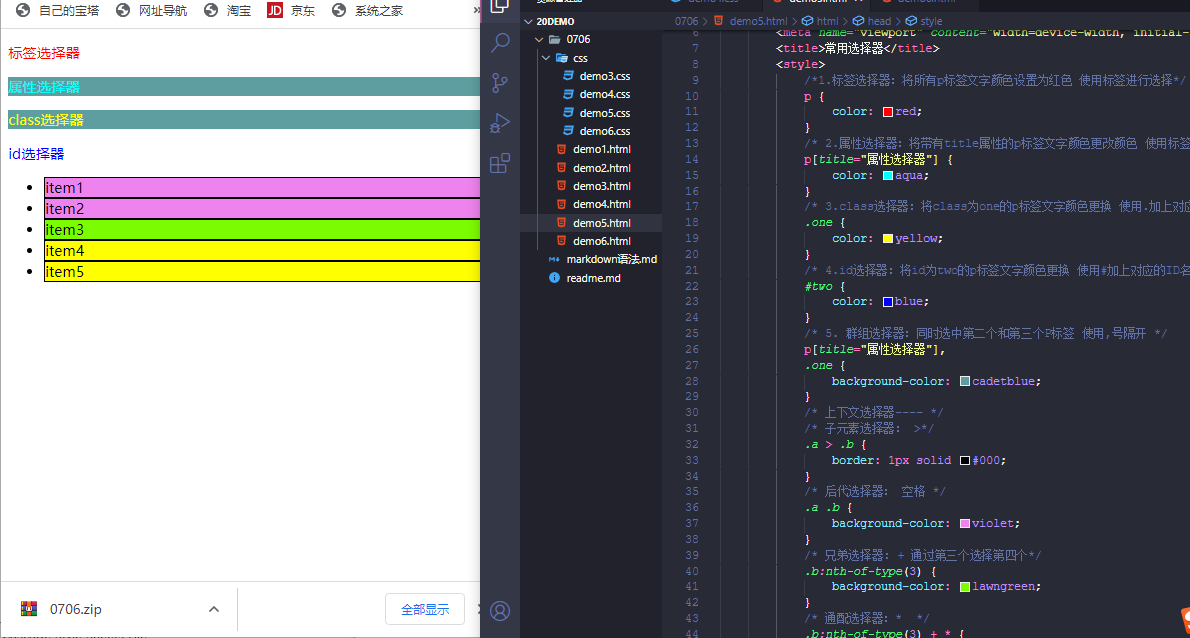
<!DOCTYPE html>
<html lang="en">
    <head>
        <meta charset="UTF-8" />
        <meta http-equiv="X-UA-Compatible" content="IE=edge" />
        <meta name="viewport" content="width=device-width, initial-scale=1.0" />
        <title>常用选择器</title>
        <style>
            /*1.标签选择器:将所有p标签文字颜色设置为红色 使用标签进行选择*/
            p {
                color: red;
            }
            /* 2.属性选择器:将带有title属性的p标签文字颜色更改颜色 使用标签内的属性特征选择*/
            p[title="属性选择器"] {
                color: aqua;
            }
            /* 3.class选择器:将class为one的p标签文字颜色更换 使用.加上对应的class名称选择 */
            .one {
                color: yellow;
            }
            /* 4.id选择器:将id为two的p标签文字颜色更换 使用#加上对应的ID名称选择*/
            #two {
                color: blue;
            }
            /* 5. 群组选择器:同时选中第二个和第三个P标签 使用,号隔开 */
            p[title="属性选择器"],
            .one {
                background-color: cadetblue;
            }
            /* 上下文选择器---- */
            /* 子元素选择器: >*/
            .a > .b {
                border: 1px solid #000;
            }
            /* 后代选择器: 空格 */
            .a .b {
                background-color: violet;
            }
            /* 兄弟选择器: + 通过第三个选择第四个*/
            .b:nth-of-type(3) {
                background-color: lawngreen;
            }
            /* 通配选择器:*  */
            .b:nth-of-type(3) + * {
                background-color: yellow;
            }
            /* 选择所有兄弟:~ */
            .b:nth-of-type(3) ~ * {
                background-color: yellow;
            }
        </style>
    </head>
    <body>
        <p>标签选择器</p>
        <p title="属性选择器">属性选择器</p>
        <p class="one">class选择器</p>
        <p id="two">id选择器</p>
        <ul class="a">
            <li class="b">item1</li>
            <li class="b">item2</li>
            <li class="b">item3</li>
            <li class="b">item4</li>
            <li class="b">item5</li>
        </ul>
    </body>
</html>
选择器权重
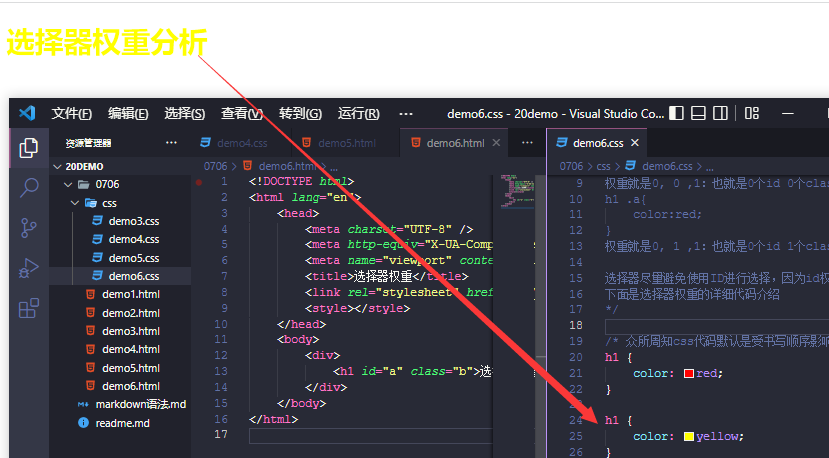
众所周知css代码默认是受书写顺序影响的例如:
<!DOCTYPE html>
<html lang="en">
    <head>
        <meta charset="UTF-8" />
        <meta http-equiv="X-UA-Compatible" content="IE=edge" />
        <meta name="viewport" content="width=device-width, initial-scale=1.0" />
        <title>选择器权重</title>
        <link rel="stylesheet" href="css/demo6.css" />
        <style></style>
    </head>
    <body>
        <div>
            <h1 id="a" class="b">选择器权重分析</h1>
        </div>
    </body>
</html>
/*
选择器权重(重点!)
选择器权重通畅可以看为三个整数 百位 十位 各位
分别对应了id class tag标签
例如
h1{
    color:red;
}
权重就是0, 0 ,1:也就是0个id 0个class 1个标签
h1 .a{
    color:red;
}
权重就是0, 1 ,1:也就是0个id 1个class 1个标签

选择器尽量避免使用ID进行选择,因为id权重太高一旦使用后面修改可能会带来麻烦
下面是选择器权重的详细代码介绍
*/
 h1 {
    color: red;
}

h1 {
    color: yellow;
}- 那么字体颜色红色将会被黄色覆盖那么我们如何让红色在不改变位置的情况下显示出来呢
 /* 方法1:改变后权重为0 , 0, 2 */
body h1 {
    color: red;
}
/*0, 0, 1*/
h1 {
    color: yellow;
}

/* 方法2: */
/* 此时权重为 0 , 1 , 1 */
h1.b {
    color: red;
}
/* 0 , 0 ,1 */
h1 {
    color: yellow;
}
/* 方法3: */
/* 1 , 0 , 1 */
h1#a {
    color: red;
}
/* 0 , 0 , 1 */
h1 {
    color: yellow;
}
方法1: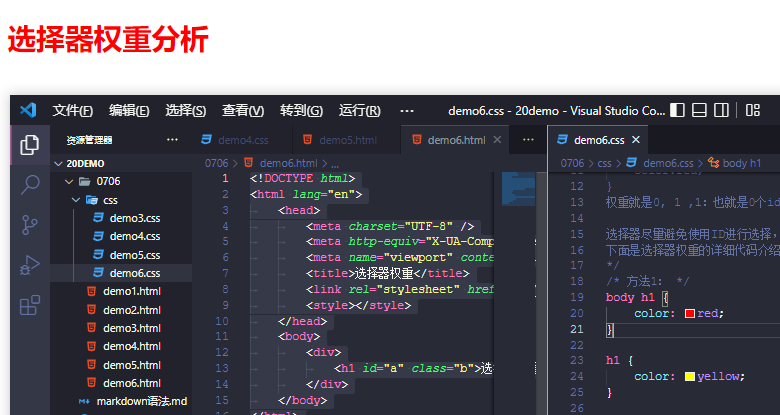
方法2: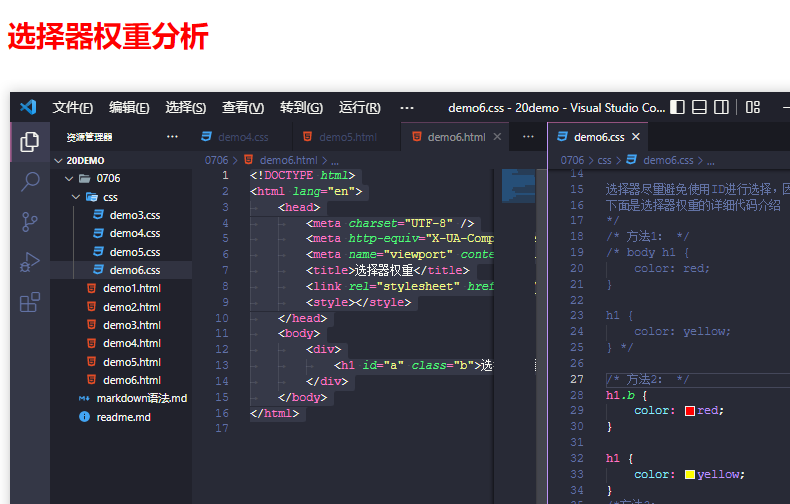
方法3: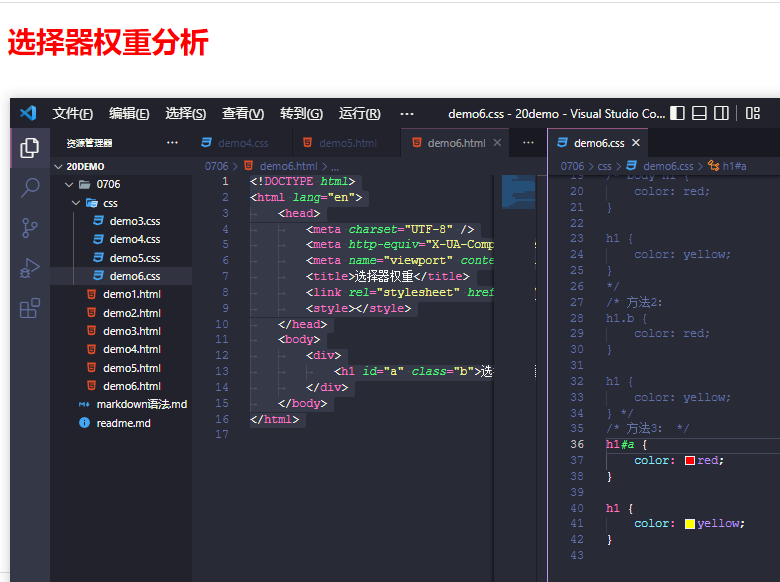
原创文章,作者:huixiang,如若转载,请注明出处:https://hui-xiang.cn/archives/46.html
